
Note
This guide is showing how to get started with the SDK C++ API. If you are interested in the Python API, follow the guide Get Started using Python
Get Started using C++ API
In this Section, we will create a minimal sample to get started with Metavision SDK C++ API. The goal of this sample is to introduce in the simplest possible way some basic concepts of Metavision SDK and create a first running example.
This tutorial will guide you in the creation of the source code step by step.
For convenience, the full source code can also be found in <install-prefix>/share/metavision/sdk/core/cpp_samples/metavision_sdk_get_started
when installing Metavision SDK from installer or packages. For other deployment methods, check the page
Path of Samples.
Setup
As with the other C++ samples of the SDK, we use CMake for our building environment.
Therefore, the first step is to create a CMakeLists.txt file to compile our sample.
Create a new text file, copy the following text, and save it as CMakeLists.txt:
project(metavision_sdk_get_started)

cmake_minimum_required(VERSION 3.5)

set(CMAKE_CXX_STANDARD 17)

find_package(MetavisionSDK COMPONENTS core driver ui REQUIRED)

set (sample metavision_sdk_get_started)
add_executable(${sample} ${sample}.cpp)
target_link_libraries(${sample} MetavisionSDK::core MetavisionSDK::driver MetavisionSDK::ui)
The first interesting line in this file is the following:
find_package(MetavisionSDK COMPONENTS core driver ui REQUIRED)
This line indicates CMake that it should include three COMPONENTS from the Metavision SDK: core, driver and ui.
The components core and driver are required for any basic operations involving cameras and events processing.
The last one (ui) will be used to display the events in a window.
We will see how those components are used in the following sections.
The second interesting line in this file is the following:
target_link_libraries(${sample} MetavisionSDK::core MetavisionSDK::driver MetavisionSDK::ui)
This line indicates CMake that it should link our sample against Metavision::core, Metavision::driver and Metavision::ui.
The other lines are standard CMake instructions. For more information, have a look at the CMake documentation.
Now that the CMake setup is completed, you can create the C++ code file.
Create a file metavision_sdk_get_started.cpp next to your CMakeLists.txt.
Note
The file name must be the same as the one specified in the CMakeLists.txt file. The executable file will have the same name.
Start the camera
The first operation we want to do is open the event-based camera or a pre-recorded event file.
In the SDK C++ API, live cameras and event files are managed in the same way: using the
Camera class. Let’s see how.
Copy the following code in the C++ file created in the previous section:
#include <metavision/sdk/driver/camera.h>

// main loop
int main(int argc, char *argv[]) {
    Metavision::Camera cam; // create the camera

    if (argc >= 2) {
        // if we passed a file path, open it
        cam = Metavision::Camera::from_file(argv[1]);
    } else {
        // open the first available camera
        cam = Metavision::Camera::from_first_available();
    }

    // start the camera
    cam.start();

    // keep running while the camera is on or the recording is not finished
    while (cam.is_running()) {
        std::cout << "Camera is running!" << std::endl;
    }

    // the recording is finished, stop the camera.
    // Note: we will never get here with a live camera
    cam.stop();
}
It is now possible to compile your code and execute it.
You can compile your sample following the same procedure as with any other Metavision sample:
mkdir build && cd build
cmake .. -DCMAKE_BUILD_TYPE=Release
cmake --build . --config Release
To execute it, you either need to plug in an event-based camera or use an a RAW or HDF5 event file (you can pick a file among our Sample Recordings).
Execute the following command if you want to process data from a live camera:
Linux
./metavision_sdk_get_started
Windows
metavision_sdk_get_started.exe
Note
If you are executing this code with a camera and get the error “Camera not found. Check that a camera is plugged into your system and retry”, please refer to our camera troubleshooting FAQ entry.
Execute the following command if you want to process data from a RAW file:
Linux
./metavision_sdk_get_started monitoring_40_50hz.raw
Windows
metavision_sdk_get_started.exe monitoring_40_50hz.raw
Note
We suggest that you run the samples in this section with an event file, as some functions are more complicated to demonstrate with a live camera.
If everything went fine, the output in your console should be similar to this:
...
Camera is running!
Camera is running!
Camera is running!
Camera is running!
Camera is running!
Camera is running!
Camera is running!
...
Note
The large number of console outputs in this tutorial may slow down their execution.
If this creates problems or prevents you from testing the code, we suggest you remove all std::cout
lines to improve execution speed.
Let’s analyze the sample line by line:
#include <metavision/sdk/driver/camera.h>
This line includes the header for the Camera class.
The Camera class can be used to get the events from a live camera, as the name suggests, but also from an
event file.
    if (argc >= 2) {
        // if we passed a file path, open it
        cam = Metavision::Camera::from_file(argv[1]);
    } else {
        // open the first available camera
        cam = Metavision::Camera::from_first_available();
    }
Here we can see how, depending on the command line parameters, an instance of the Camera class can be used
to read from a file (cam = Metavision::Camera::from_file();) or to stream from a camera
(cam = Metavision::Camera::from_first_available();).
Now that we have our cam instance, the rest of the source code will be the same whether the events are coming
from a file or from a live camera.
cam.start();
This line simply starts the camera, from now on the camera will be active and stream events.
    // keep running while the camera is on or the recording is not finished
    while (cam.is_running()) {
        std::cout << "Camera is running!" << std::endl;
    }
This while loop simply continues printing Camera is running! while the camera is running
(cam.is_running()).
For now, the camera runs until the recording is finished, in case of an event file, or forever in case
of a live camera (at least, while the camera is plugged-in).
cam.stop();
This line stops the camera. Since a live camera will never get outside the while loop explained before,
this point can be reached only when using an event file.
We will see in the next sections how to stop a live camera.
In this section, we learned how to open a camera or a file using the Camera class,
and how to start and stop a camera. In the next section, we will learn how to get access to the events.
Get the events
The Camera class, as many other components of the SDK, works using
callbacks.
This means that we do not directly get access to the events. Instead, we need to create a function that will
be called automatically whenever a buffer of events is ready to be processed.
Copy the following code into your metavision_sdk_get_started.cpp file:
#include <metavision/sdk/driver/camera.h>
#include <metavision/sdk/base/events/event_cd.h>

// this function will be associated to the camera callback
void count_events(const Metavision::EventCD *begin, const Metavision::EventCD *end) {
    int counter = 0;

    // this loop allows us to get access to each event received in this callback
    for (const Metavision::EventCD *ev = begin; ev != end; ++ev) {
        ++counter; // count each event

        // print each event
        std::cout << "Event received: coordinates (" << ev->x << ", " << ev->y << "), t: " << ev->t
                  << ", polarity: " << ev->p << std::endl;
    }

    // report
    std::cout << "There were " << counter << " events in this callback" << std::endl;
}

// main loop
int main(int argc, char *argv[]) {
    Metavision::Camera cam; // create the camera

    if (argc >= 2) {
        // if we passed a file path, open it
        cam = Metavision::Camera::from_file(argv[1]);
    } else {
        // open the first available camera
        cam = Metavision::Camera::from_first_available();
    }

    // to analyze the events, we add a callback that will be called periodically to give access to the latest events
    cam.cd().add_callback(count_events);

    // start the camera
    cam.start();

    // keep running while the camera is on or the recording is not finished
    while (cam.is_running()) {}

    // the recording is finished, stop the camera.
    // Note: we will never get here with a live camera
    cam.stop();
}
Recompile the file and execute it. The output should be similar to this:
...
Event received: coordinates (10, 252), t: 1638, polarity: 1
Event received: coordinates (12, 252), t: 1638, polarity: 1
Event received: coordinates (63, 252), t: 1638, polarity: 1
Event received: coordinates (67, 252), t: 1638, polarity: 1
There were 288 events in this callback
Event received: coordinates (66, 252), t: 1638, polarity: 1
Event received: coordinates (64, 252), t: 1638, polarity: 1
Event received: coordinates (65, 252), t: 1638, polarity: 1
...
If we look at the main loop, we can see the new call to setup the callback:
cam.cd().add_callback(count_events);
This line indicates the Camera class to call the function count_events when there are
CD events available.
The count_events function is defined at the top of the file.
Compared to the last example, here we removed the std::cout call in the while loop to avoid cluttering the
console output.
Since we are now dealing directly with events, we need to include the relevant header.
#include <metavision/sdk/base/events/event_cd.h>
Let’s now have a look at the count_events function:
void count_events(const Metavision::EventCD *begin, const Metavision::EventCD *end) {
    int counter = 0;

    // this loop allows us to get access to each event received in this callback
    for (const Metavision::EventCD *ev = begin; ev != end; ++ev) {
        ++counter; // count each event

        // print each event
        std::cout << "Event received: coordinates (" << ev->x << ", " << ev->y << "), t: " << ev->t
                  << ", polarity: " << ev->p << std::endl;
    }

    // report
    std::cout << "There were " << counter << " events in this callback" << std::endl;
}
As explained, this function is called every time new CD events are available.
To be compatible with the callback, a function needs to return void and have as parameters two iterators to the
beginning and the end of the buffer of events that will be available to the function.
These two iterators allow us to access all the new events passed in this callback.
We can now create a for loop to compute some simple statistics on the events and print them:
    for (const Metavision::EventCD *ev = begin; ev != end; ++ev) {
        ++counter; // count each event

        // print each event
        std::cout << "Event received: coordinates (" << ev->x << ", " << ev->y << "), t: " << ev->t
                  << ", polarity: " << ev->p << std::endl;
    }
For each event, we increment a counter, allowing us to count the number of events available in the current callback.
We also print the details of each event, displaying its coordinates, timestamp and polarity:
        std::cout << "Event received: coordinates (" << ev->x << ", " << ev->y << "), t: " << ev->t
                  << ", polarity: " << ev->p << std::endl;
We now have access to the events produced by the Camera class.
With this, we will be able to write all our event-based algorithms.
Add a dedicated processing class
In the previous section, we learned how to use the Camera callback to get access to the events.
Creating an independent function for the callback is useful for simple analysis, but not practical for more advanced
uses.
In this section, we will show how to create a dedicated class for event processing.
As before, copy the following code into your metavision_sdk_get_started.cpp file:
#include <metavision/sdk/driver/camera.h>
#include <metavision/sdk/base/events/event_cd.h>

// this class will be used to analyze the events
class EventAnalyzer {
public:
    // class variables to store global information
    int global_counter                 = 0; // this will track how many events we processed
    Metavision::timestamp global_max_t = 0; // this will track the highest timestamp we processed

    // this function will be associated to the camera callback
    // it is used to compute statistics on the received events
    void analyze_events(const Metavision::EventCD *begin, const Metavision::EventCD *end) {
        std::cout << "----- New callback! -----" << std::endl;

        // time analysis
        // Note: events are ordered by timestamp in the callback, so the first event will have the lowest timestamp and
        // the last event will have the highest timestamp
        Metavision::timestamp min_t = begin->t;     // get the timestamp of the first event of this callback
        Metavision::timestamp max_t = (end - 1)->t; // get the timestamp of the last event of this callback
        global_max_t = max_t; // events are ordered by timestamp, so the current last event has the highest timestamp

        // counting analysis
        int counter = 0;
        for (const Metavision::EventCD *ev = begin; ev != end; ++ev) {
            ++counter; // increasing local counter
        }
        global_counter += counter; // increase global counter

        // report
        std::cout << "There were " << counter << " events in this callback" << std::endl;
        std::cout << "There were " << global_counter << " total events up to now." << std::endl;
        std::cout << "The current callback included events from " << min_t << " up to " << max_t << " microseconds."
                  << std::endl;

        std::cout << "----- End of the callback! -----" << std::endl;
    }
};

// main loop
int main(int argc, char *argv[]) {
    Metavision::Camera cam;       // create the camera
    EventAnalyzer event_analyzer; // create the event analyzer

    if (argc >= 2) {
        // if we passed a file path, open it
        cam = Metavision::Camera::from_file(argv[1]);
    } else {
        // open the first available camera
        cam = Metavision::Camera::from_first_available();
    }

    // to analyze the events, we add a callback that will be called periodically to give access to the latest events
    cam.cd().add_callback([&event_analyzer](const Metavision::EventCD *ev_begin, const Metavision::EventCD *ev_end) {
        event_analyzer.analyze_events(ev_begin, ev_end);
    });

    // start the camera
    cam.start();

    // keep running while the camera is on or the recording is not finished
    while (cam.is_running()) {}

    // the recording is finished, stop the camera.
    // Note: we will never get here with a live camera
    cam.stop();

    // print the global statistics
    double length_in_seconds = event_analyzer.global_max_t / 1000000.0;
    std::cout << "There were " << event_analyzer.global_counter << " events in total." << std::endl;
    std::cout << "The total duration was " << length_in_seconds << " seconds." << std::endl;
    if (length_in_seconds >= 1) { // no need to print this statistics if the total duration was too short
        std::cout << "There were " << event_analyzer.global_counter / (event_analyzer.global_max_t / 1000000.0)
                  << " events per seconds on average." << std::endl;
    }
}
Recompile the file and execute it. The output should be similar to this:
...
----- New callback! -----
There were 288 events in this callback
There were 185048 total events up to now.
The current callback included events from 25855 up to 25870 microseconds.
----- End of the callback! -----
...
The main change of this new sample is that we replaced the event_count function with a dedicated class
EventAnalyzer. However, the concept is the same: you need to define a function to add as a callback
to the Camera class.
Before this function was defined independently, now it is a member function of the class EventAnalyzer.
Notice how we also replaced the simple callback of the previous sample with a more complex one:
    cam.cd().add_callback([&event_analyzer](const Metavision::EventCD *ev_begin, const Metavision::EventCD *ev_end) {
        event_analyzer.analyze_events(ev_begin, ev_end);
    });
Given that now the function we want to use for the callback is inside a class, it would have been necessary to create a wrapper function to manage the communication between the callback and the class function. This would have been possible, but a more concise solution is the use of a lambda expression. With this call, we can set a new callback without the need to explicitly create a separate function.
Let’s have a look now at the EventAnalyzer::analyze_events() function.
Similarly to the previous sample, the goal of this function is compute interesting statistics on the received events: the min and the max timestamps of the received events, and the total number of events.
To extract the min and the max timestamps, we leverage the fact that the events in each callback are provided in temporal order, so we can assume that the first event has the min timestamp of this batch, and the last event has the max timestamp.
        Metavision::timestamp min_t = begin->t;     // get the timestamp of the first event of this callback
        Metavision::timestamp max_t = (end - 1)->t; // get the timestamp of the last event of this callback
As with the previous sample, we count how many events are in this callback, by increasing a counter with a for loop.
        int counter = 0;
        for (const Metavision::EventCD *ev = begin; ev != end; ++ev) {
            ++counter; // increasing local counter
        }
One of the advantages of using a class is that we can store information over multiple callbacks. For example, here we store the max timestamp over all callbacks:
global_max_t = max_t; // events are ordered by timestamp, so the current last event has the highest timestamp
We also store the total number of events received:
global_counter += counter; // increase global counter
Once our instance of Camera has been stopped (that is, when the event file finishes),
we can print global statistics of this file:
    double length_in_seconds = event_analyzer.global_max_t / 1000000.0;
    std::cout << "There were " << event_analyzer.global_counter << " events in total." << std::endl;
    std::cout << "The total duration was " << length_in_seconds << " seconds." << std::endl;
    if (length_in_seconds >= 1) { // no need to print this statistics if the total duration was too short
        std::cout << "There were " << event_analyzer.global_counter / (event_analyzer.global_max_t / 1000000.0)
                  << " events per seconds on average." << std::endl;
    }
In this section, we learned how using a dedicated class we can do more complex analysis and store information between callbacks. We also introduced the use of lambda expressions to simplify the setup of a callback. With this knowledge, we will show in the next section how to create a display to visualize the output of the camera.
Add a display
As we have seen in the previous sections, a camera (or an event file) produces a stream of independent events. Hence we don’t have ready-to-display frames to show. So, to visualize these events, we must artificially build frames by accumulating events over time. This can be done in different ways, but the easiest is to create a binary frame: we start with a frame where each pixel is set to zero, and we set to one the corresponding pixel every time we receive an event. We need to choose the frequency at which these frames are constructed, that is, the equivalent FPS, and how long we accumulate the events, that is, the accumulation time. See also the documentation on Event-Based Concepts for more information.
Doing this frame construction from scratch, while possible, can be complex and long. Luckily, Metavision SDK contains
a class that can help us with this task: PeriodicFrameGenerationAlgorithm.
First, add this snippet of code to the previous sample, before cam.start():
    // to visualize the events, we will need to build frames and render them.
    // building frame will be done with a frame generator that will accumulate the events over time.
    // we need to provide it the camera resolution that we can retrieve from the camera instance
    int camera_width  = cam.geometry().width();
    int camera_height = cam.geometry().height();

    // we also need to choose an accumulation time and a frame rate (here of 20ms and 50 fps)
    const std::uint32_t acc = 20000;
    double fps              = 50;

    // now we can create our frame generator using previous variables
    auto frame_gen = Metavision::PeriodicFrameGenerationAlgorithm(camera_width, camera_height, acc, fps);

    // we add the callback that will pass the events to the frame generator
    cam.cd().add_callback([&](const Metavision::EventCD *begin, const Metavision::EventCD *end) {
        frame_gen.process_events(begin, end);
    });

    // to render the frames, we create a window using the Window class of the UI module
    Metavision::Window window("Metavision SDK Get Started", camera_width, camera_height,
                              Metavision::BaseWindow::RenderMode::BGR);

    // we set a callback on the windows to close it when the Escape or Q key is pressed
    window.set_keyboard_callback(
        [&window](Metavision::UIKeyEvent key, int scancode, Metavision::UIAction action, int mods) {
            if (action == Metavision::UIAction::RELEASE &&
                (key == Metavision::UIKeyEvent::KEY_ESCAPE || key == Metavision::UIKeyEvent::KEY_Q)) {
                window.set_close_flag();
            }
        });

    // we set a callback on the frame generator so that it calls the window object to display the generated frames
    frame_gen.set_output_callback([&](Metavision::timestamp, cv::Mat &frame) { window.show(frame); });
Now replace the while loop, with this code:
    // keep running until the camera is off, the recording is finished or the escape key was pressed
    while (cam.is_running() && !window.should_close()) {
        // we poll events (keyboard, mouse etc.) from the system with a 20ms sleep to avoid using 100% of a CPU's core
        // and we push them into the window where the callback on the escape key will ask the windows to close
        static constexpr std::int64_t kSleepPeriodMs = 20;
        Metavision::EventLoop::poll_and_dispatch(kSleepPeriodMs);
    }
We also need to include the PeriodicFrameGenerationAlgorithm header.
Copy this line at the beginning of your file:
#include <metavision/sdk/core/algorithms/periodic_frame_generation_algorithm.h>
Recompile and execute. This is the expected result:
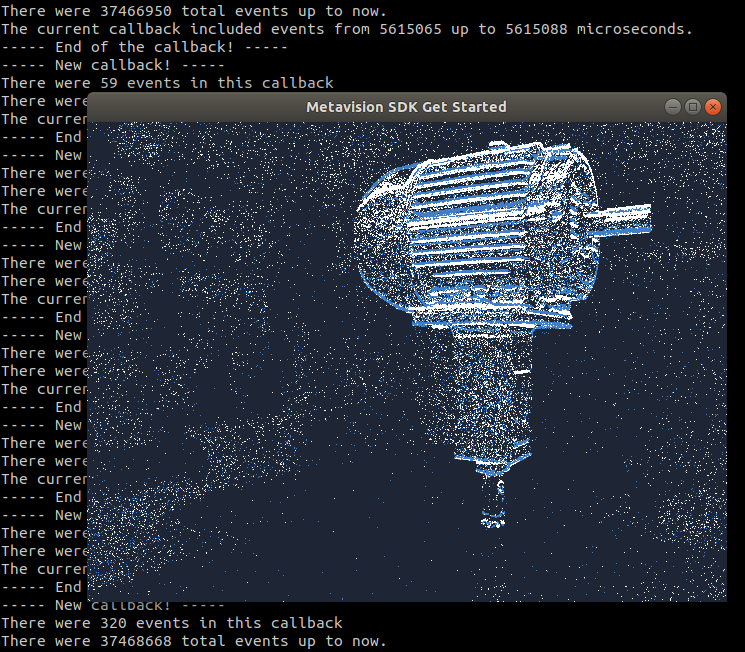
Let’s now see how the visualization works.
The frame generator works in the following way: we need to create it by passing the resolution of the camera,
as well as the accumulation time and the FPS. We then need to pass events to it for displaying.
This is done as before by adding a callback to the Camera class.
Note that PeriodicFrameGenerationAlgorithm only creates frames from the events,
it does not manage the visualization. For visualization, we will make use of the Window
class of the UI module.
So, first we need to get the camera resolution, to be able to properly initialize the frame visualization.
We can use the Camera::Geometry class to get it:
    int camera_width  = cam.geometry().width();
    int camera_height = cam.geometry().height();
Then, to build frames we need too choose how long we accumulate the events over time for each frame, and the frequency at which we build new frames. Here we choose an accumulation time of 20ms and a frame rate of 50 fps.
    const std::uint32_t acc = 20000;
    double fps              = 50;
We can now create the frame generator:
auto frame_gen = Metavision::PeriodicFrameGenerationAlgorithm(camera_width, camera_height, acc, fps);
We then need to pass the events from the camera to the frame generator, so that it can accumulate them and create the frame for visualization. Similarly to what we saw before, this is done using another callback: every time some events are available, they will be passed to the frame generator.
Note
We can add multiple callbacks to the same camera by calling the Metavision::Camera::cd()::add_callback()
function multiple times on the same instance.
These multiple callbacks are not competing for events: each callback will be called with the same events once
they become available.
The callback for the frame generator is added as before using a lambda expression:
    cam.cd().add_callback([&](const Metavision::EventCD *begin, const Metavision::EventCD *end) {
        frame_gen.process_events(begin, end);
    });
To render the frames on screen, we create a window using the Window class of the UI module
    Metavision::Window window("Metavision SDK Get Started", camera_width, camera_height,
                              Metavision::BaseWindow::RenderMode::BGR);
We also set a callback on the windows to close it when the Escape or Q key is pressed
    window.set_keyboard_callback(
        [&window](Metavision::UIKeyEvent key, int scancode, Metavision::UIAction action, int mods) {
            if (action == Metavision::UIAction::RELEASE &&
                (key == Metavision::UIKeyEvent::KEY_ESCAPE || key == Metavision::UIKeyEvent::KEY_Q)) {
                window.set_close_flag();
            }
To link the frame generator with the window, we set a callback on the frame generator that will call the show
function when an frame has been generated and is ready to be displayed.
frame_gen.set_output_callback([&](Metavision::timestamp, cv::Mat &frame) { window.show(frame); });
Note
For more information on the Metavision::Window class, you can consult the
sample on window management in the UI module.
So now, once the camera is started (cam.start();), it will keep running until the camera is turned off,
the recording is finished or the key Escape or Q is pressed. To do so, we modify our while loop.
We still have the call to cam.is_running() but now we also check if the window should be closed with
!window.should_close(). This last function relies on the events from the system (keyboard, mouse etc.)
that we poll with a 20ms sleep (to avoid using 100% of a CPU’s core). This way the callback on the keyboard
will be triggered and the set_close_flag() will be called.
    while (cam.is_running() && !window.should_close()) {
        // we poll events (keyboard, mouse etc.) from the system with a 20ms sleep to avoid using 100% of a CPU's core
        // and we push them into the window where the callback on the escape key will ask the windows to close
        static constexpr std::int64_t kSleepPeriodMs = 20;
        Metavision::EventLoop::poll_and_dispatch(kSleepPeriodMs);
    }
This finally allows us to stop our sample even with a live camera, something that was not possible in the previous versions of this sample.
To summarize, in this section, we learned how to add another callback to the Camera and use the
Metavision::PeriodicFrameGenerationAlgorithm to create frames out of the events and display them.
Add an algorithm
In the previous sections, we learned how to call two callbacks on the CD events: one to get access to the events to output some analysis and another one to compute some frames that are then displayed.
In the last step of this tutorial, we will show a very basic use of one the Metavision SDK algorithms to do some processing on the events before displaying them.
We choose to show FlipXAlgorithm that mirrors the X axis of the event stream.
First, we include the C++ header of the algorithm:
#include <metavision/sdk/core/algorithms/flip_x_algorithm.h>
Then we instantiate this algorithm using the width of the camera in the argument:
    // we create an algorithm that mirrors the X axis of the event stream
    auto algo = Metavision::FlipXAlgorithm(camera_width - 1);
Finally, we modify the lambda function of the frame generator callback that we created in the previous section:
instead of sending the event buffer directly to the frame generator, we first process it with our FlipXAlgorithm:
    // we add the callback that will pass the events to the algo and then the frame generator
    cam.cd().add_callback([&](const Metavision::EventCD *begin, const Metavision::EventCD *end) {
        // we use a vector of CD events to store the output of the algo
        std::vector<Metavision::EventCD> output;
        algo.process_events(begin, end, std::back_inserter(output));
        // we call the frame generator on the processed events
        frame_gen.process_events(output.begin(), output.end());
    });
Now, if you recompile the code and launch it, you will see that the stream of events is mirrored on the X axis. Feel free to experiment this code with other algorithms (processing, filtering…) that you can choose from the Metavision SDK algorithms page.
Next steps
In this page, we introduced a minimal example of how to use the Metavision SDK to open a camera, compute some simple statistics on the received events, visualize the events and apply a simple algorithm on the events.
Note that the sample presented here was designed for simplicity. This comes at the cost of performance. For example,
performing complex operations directly in the callback is not advised: the callback blocks the Camera
instance until the processing is finished, something that could create memory issues.
Moreover, there is no guarantee that a callback happens at a regular interval, which might be useful for some
algorithms.
A better approach could be to store events for later use, passing them from class to class, and setting up threads
to perform parallel computation.
To build up on this code sample, you can explore more features of your camera, by accessing
the facilities of your HAL device.
For example, you can check in the source code of metavision_viewer
how to access the biases facility (camera.biases())
or the hardware identification one (camera.get_device().get_facility<Metavision::I_HW_Identification>()).
We also encourage you to discover more complex examples in our samples page.