
Precomputing features as HDF5 tensor files
Introduction
Machine learning is an iterative process, especially during the phase of training. However, it might not be necessary to recompute the features each time. Therefore it is convenient to preprocess the data once and store it in a preprocessed format. In Metavision SDK, we chose to use HDF5, a high-performance database format that is versatile and offers interfaces in many languages (including Python) to create our own HDF5 tensor file format.
In this tutorial, we show how to precompute features from event-based data and save them in HDF5 tensor format, with the goal of reducing storage size and avoiding repeated preprocessing.
In the SDK Machine Learning module, we offer two options to process it:
Use generate_hdf5.py Python sample script
Use ML module directly
Use generate_hdf5 script
The python script generate_hdf5.py is available to convert RAW or DAT files into tensors in HDF5 format, with a predefined preprocessing function.
To see how to use generate_hdf5.py, check the dedicated sample page.
Use ML module directly
Alternatively, you can create your own script by importing the ML module.
Here are the general steps that you can follow.
1. Load all necessary libraries and input data
%matplotlib inline
import os

import numpy as np
import h5py
from matplotlib import pyplot as plt

from metavision_ml.preprocessing.viz import filter_outliers
from metavision_ml.preprocessing.hdf5 import generate_hdf5
Here is the link to download the RAW file used in this sample: traffic_monitoring.raw
input_path = "traffic_monitoring.raw"
2. Run function generate_hdf5
with the following main parameters:
input (
paths)output (
output_folder)preprocessing function (
preprocess)sampling period (
delta_t)
Note
Note that here we choose to use timesurface to process the raw
events, but you could use any of the available preprocessing methods or
a customized function that has been registered using the
register_new_preprocessing() function.
Take a look at the Event Preprocessing Tutorial for more information.
output_folder = "."
output_path = output_folder + os.sep + os.path.basename(input_path).replace('.raw', '.h5')
if not os.path.exists(output_path):
    generate_hdf5(paths=input_path, output_folder=output_folder, preprocess="timesurface", delta_t=250000, height=None, width=None,
              start_ts=0, max_duration=None)

print('\nOriginal file \"{}" is of size: {:.3f}MB'.format(input_path, os.path.getsize(input_path)/1e6))
print('\nResult file \"{}" is of size: {:.3f}MB'.format(output_path, os.path.getsize(output_path)/1e6))
The oupput will be similar to:
0it [00:00, ?it/s]
Processing traffic_monitoring.raw, storing results in ./traffic_monitoring.h5
1it [00:00,  1.79it/s]
2it [00:00,  3.40it/s]
(...)
25it [00:02,  9.44it/s]
28it [00:03,  8.73it/s]

Original file "traffic_monitoring.raw" is of size: 73.507MB
Result file "./traffic_monitoring.h5" is of size: 26.452MB
We can see how the size of the stored data is reduced compared to the original input. Also, now that the data is preprocessed, we do not need to re-process it again every time when we want to use it.
Note
The size of the RAW file is directly linked to the number of events in the file. This number is a consequence of the motions and illumination changes that occurred in front of the sensor. The HDF5 tensor file, on the other hand, is frame based. With a given preprocessing function and sampling duration, all HDF5 tensor files should normally contain the same number of tensors regardless of the content.
As a result, uncompressed RAW files, which contain a really high temporal precision will be quite large on rich motion scene but a lot smaller for simpler scenes and fixed camera setting, while compressed HDF5 tensor files, with their fixed frame rate, will yield huge gains on those rich scenes but less so on simpler scenes.
Exploring the format of HDF5 tensor files
We store the precomputed event-based tensors in HDF5 datasets named “data”. The metadata and parameters used during preprocessing are stored as associated attributes of “data”.
Let’s first have a look at the “data”.
f  = h5py.File(output_path, 'r')  # open the HDF5 tensor file in read mode
print(f['data'])  # show the 'data' dataset
<HDF5 dataset "data": shape (112, 2, 480, 640), type "<f4">
Similar to NumPy arrays, you can get their shape and dtype attributes:
hdf5_shape = f['data'].shape
print(hdf5_shape)
print(f['data'].dtype)
Here is a typical output:
(112, 2, 480, 640)
float32
You can also get the attributes associated to the datasets as well with such a script:
print("Attributes :\n")
for key in f['data'].attrs:
    print('\t', key, ' : ', f['data'].attrs[key])
That would return something similar to:
Attributes :

     delta_t  :  250000
     event_input_height  :  480
     event_input_width  :  640
     events_to_tensor  :  b'timesurface'
     max_incr_per_pixel  :  5.0
     shape  :  [  2 480 640]
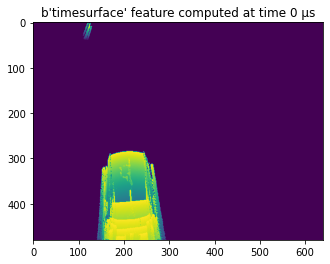
Let’s now use visualize the data stored within this HDF5 tensor file.
for i, timesurface in enumerate(f['data'][:10]):

    plt.imshow(filter_outliers(timesurface[0], 7)) #filter out some noise
    plt.title("{:s} feature computed at time {:d} μs".format(f['data'].attrs['events_to_tensor'],
                                                          f['data'].attrs["delta_t"] * i))
    plt.pause(0.01)
That will return such an image:
Note
Note that the HDF5 dataset variable is similar to a numpy
ndarray but has some unique features. An important difference is
that, if you read from an HDF5 dataset, the data is actually read from
drive and put to memory as a numpy array. If you are handling a large
dataset, it is recommended not to read the whole file all at once, to
avoid saturating the memory.
Enriching an HDF5 tensor file
HDF5 tensor files are flexible and can be easily edited, which means that you
can add other datasets than events. For example, you can include the
ground truth labels, statistics and so on. Look at the h5py
documentation for more examples.
Heer is how to add a confidence score label to our existing “data” dataset at each delta time.
label = np.random.rand(hdf5_shape[0])

with h5py.File(output_path, 'r+') as f:
    try:
        # We can create a dataset directly from a numpy array in the following fashion:
        label_dset = f.create_dataset("confidence", data=label)
        # and then add some metadata to this dataset
        label_dset.attrs['label_type'] = np.string_("random confidence score")
    except ValueError:
        print("confidence dataset already exists")

print("The file now contains the following keys: ", h5py.File(output_path, 'r').keys())