
Installation of SDK on Linux Ubuntu with packages
This section describes how to install Metavision SDK on Linux Ubuntu 22.04 and 24.04 64-bit with packages.
Note
Metavision SDK comes as pre-built Ubuntu packages of our whole software offer. If you want to work from source (for example, to compile on platforms other than those we officially support), follow the specific guide on the Installation of SDK on Linux from sources.
Table of Contents
Supported Cameras
Metavision SDK comes with a Prophesee camera plugin, enabling streaming of data from our event-based cameras and to read recordings of event-based data. The supported cameras are:
If you want to use a Prophesee EVK that is not in the list above, it might have been discontinued. Refer to the Prophesee EVKs Support section to find out which previous version of the SDK is supporting it.
If you own a third-party vendor event-based camera, refer to the Camera Plugin Installation page to see how it can be deployed and configured.
Required Configuration
Please note the minimum system requirements for using Metavision SDK:
Operating system: Linux Ubuntu 22.04 or 24.04 64-bit
Architecture: amd64 (a.k.a. x64)
Graphics card: must support at least OpenGL 3.0
CPU: must support AVX2
To install the SDK on Windows, see the page SDK installation on Windows. For other operating systems and architectures, you must install the SDK from source or clone our open source project OpenEB and contact us if you run into compatibility issues.
Note
If you want to install Metavision SDK packages on an older version of Ubuntu that we don’t support anymore, you can refer to the Prophesee Operating System Support page to find out which previous version of the SDK is supporting it.
Required Authentication Settings
When installing Metavision SDK using Debian packages, required artifacts are retrieved from our JFrog Artifactory APT server.
In the next sections, we will provide detailed steps for configuring your system. However, in this preliminary section, we will focus on setting up your authentication credentials to ensure smooth access to our server.
Before proceeding with the installation, let’s first verify that you have the necessary access to our Artifactory server:
If you don’t have a Prophesee Microsoft Entra ID account yet, request one by completing this form
Ensure you are not currently logged into any other domains with a Microsoft Entra ID account besides Prophesee. To avoid conflicts, consider using a private or incognito browsing window, which will isolate your login session.
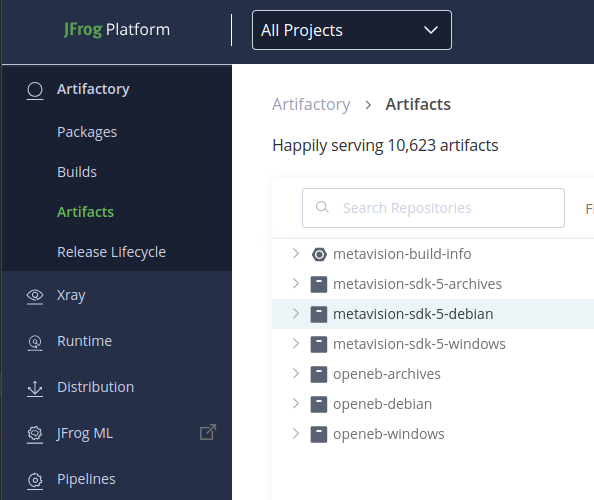
Connect to https://propheseeai.jfrog.io
Choose “SAML SSO” login type
Enter your Entra ID credentials. Your login should follow this format: jdoe@customers.prophesee.ai
You should now see something similar to:
Next, create your JFrog Identity Token:
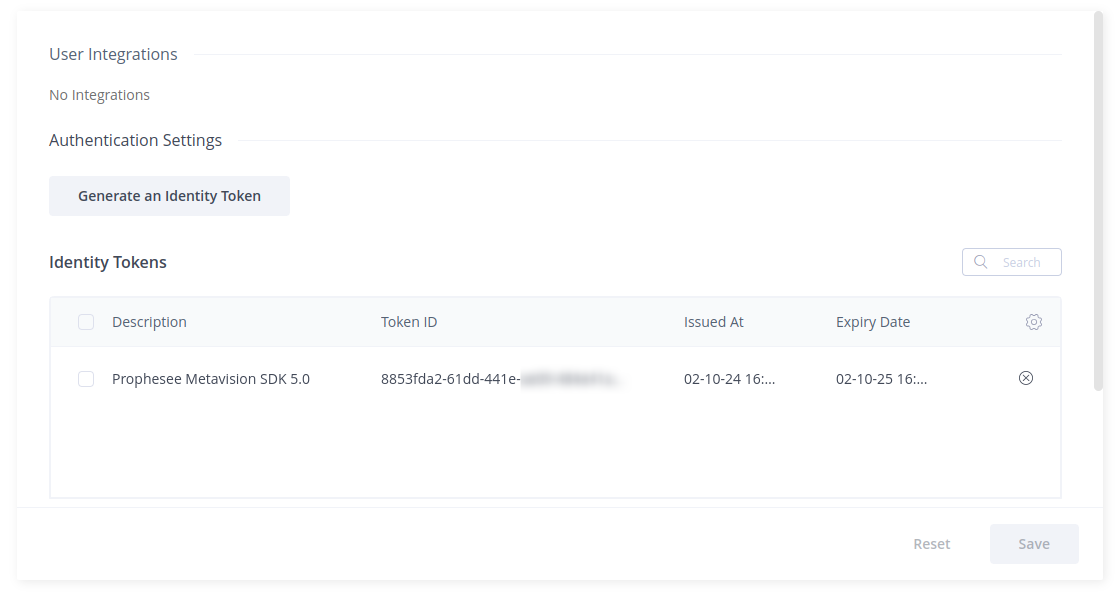
Edit your profile
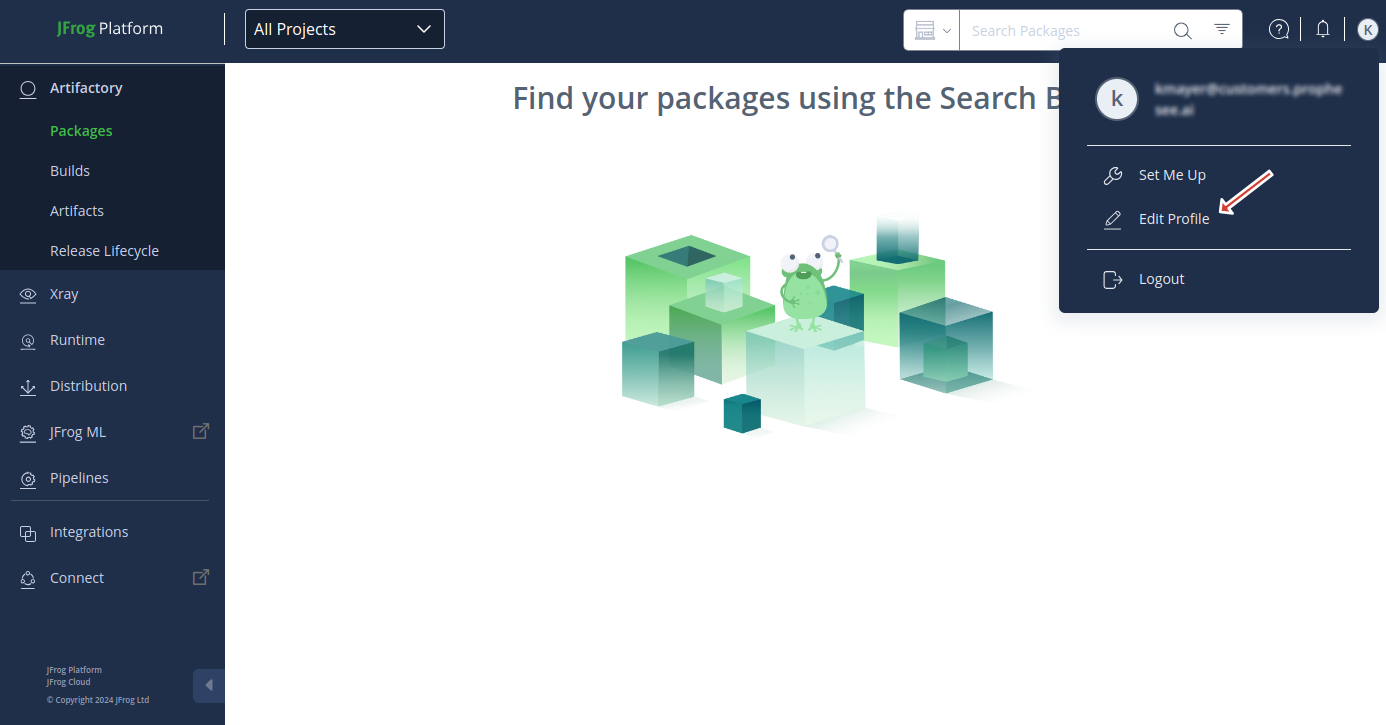
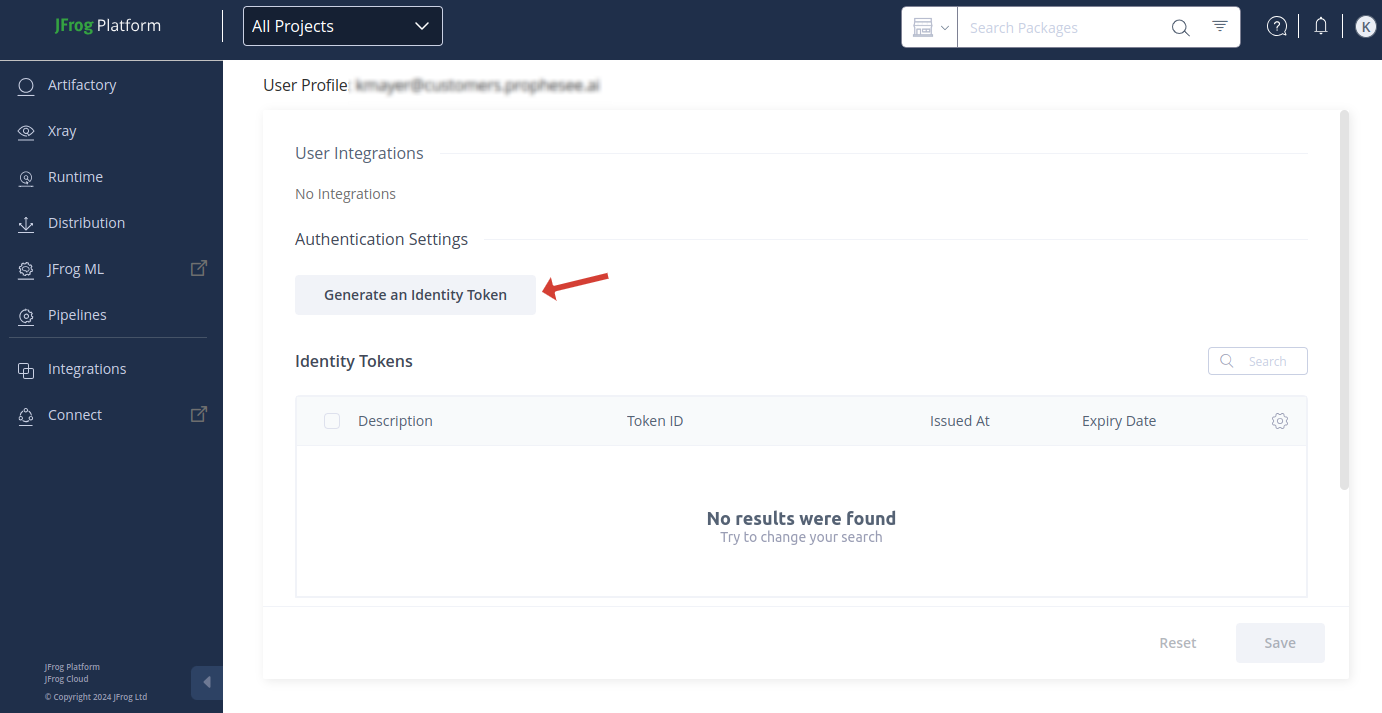
In the “Authentication Settings” section, click on “Generate an Identity Token”
Enter a description for your token
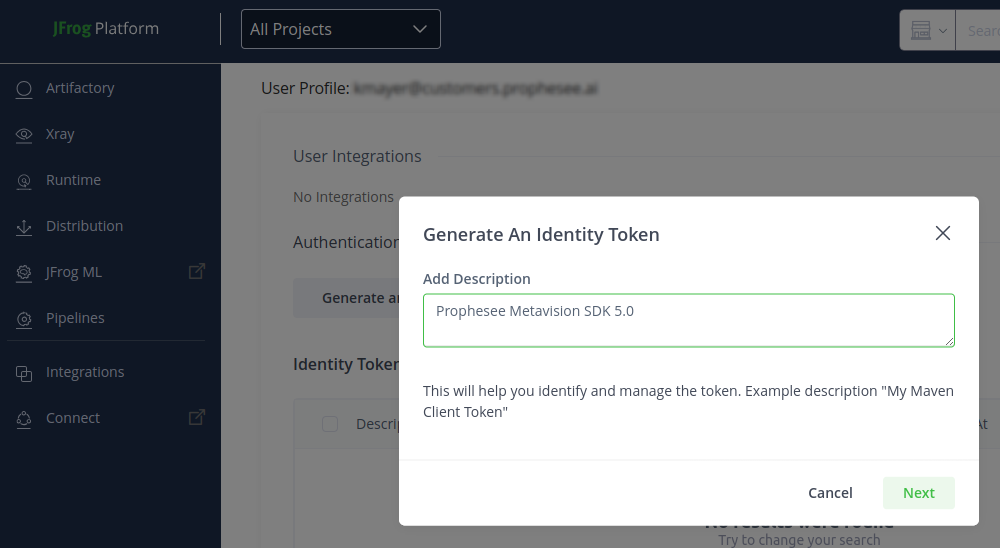
Once your token is created, ensure you store the “Reference Token” value securely, as you will need it later for configuration.
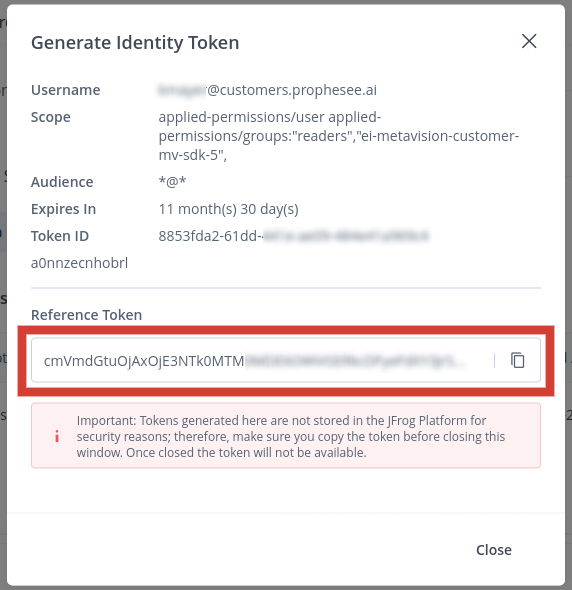
Your token was successfully created, you can now move to the next section
Upgrading Metavision
If you are upgrading Metavision SDK from a previous version, you should carefully read the Release Notes as some changes may impact your usage of our SDK (e.g. API updates) and cameras (e.g. firmware update might be necessary).
Then, you will need to remove the previously installed Prophesee software:
sudo apt remove '~nprophesee-.*' '~nmetavision-.*' '~nhdf5-ecf-*' '~nhdf5-plugin-ecf-*' --purge
Warning
The “apt upgrade” mechanism is currently not supported by our SDK. Hence, removing the old version of Metavision SDK is mandatory even for patch upgrades (e.g. from x.y.0 to x.y.1)
Installation
Start by configuring the APT software repository of your system:
First, clean your sources list and preferences directories from potential earlier installation of Prophesee software:
remove any prophesee file from the folder
/etc/apt/sources.list.d(e.g.sdk.list,metavision.listand .list files with “prophesee”)cd /etc/apt/sources.list.d sudo rm sdk.list metavision.list *prophesee*.listRemove any Prophesee file (e.g. with pattern
prophesee) from the folders/etc/apt/preferences.dand/etc/apt/auth.conf.dsudo rm /etc/apt/preferences.d/*prophesee* sudo rm /etc/apt/auth.conf.d/*prophesee*Remove any Prophesee Server listed in the file
/etc/apt/sources.listInstall our JFrog server signing public key
sudo apt -y install curl
curl -L https://propheseeai.jfrog.io/artifactory/api/security/keypair/prophesee-gpg/public >/tmp/propheseeai.jfrog.op.asc
sudo cp /tmp/propheseeai.jfrog.op.asc /etc/apt/trusted.gpg.d
Add Prophesee’s Metavision SDK JFrog server to the list of your APT sources:
If you recently created your JFrog account, use the following repository:
sudo add-apt-repository 'https://<USER>:<TOKEN>@propheseeai.jfrog.io/artifactory/metavision-sdk-5-debian-nc/'
If your JFrog account was created some time ago, use this repository instead:
sudo add-apt-repository 'https://<USER>:<TOKEN>@propheseeai.jfrog.io/artifactory/metavision-sdk-5-debian/'where:
<USER> is the login of your Prophesee MS Entra ID account (for example, jdoe@customers.prophesee.ai)
<TOKEN> is the identity token generated from your JFrog account, as described in the Required Authentication Settings section
Update the package list and install Metavision SDK:
sudo apt update
sudo apt -y install metavision-sdk
Warning
If the above command returns the error E: unable to locate package metavision-sdk, it might mean that you did not properly install the APT server list. More probably, you tried to install Metavision SDK on a platform that we don’t support. In that case, ensure that your OS is Ubuntu 22.04 or 24.04 on amd64/x64. For example, if you are trying to install on a NVidia Jetson or a Raspberry Pi, you will get this error as both are not amd64-based but arm-based. If you want to work on a non-supported platform, you should compile the SDK from sources.
Note
If you need to install the previous version of the software (SDK 5.0), you must take an additional step beyond the instructions outlined above. Specifically, you should “pin” this version in the APT server configuration by running the following command:
sudo sh -c "echo 'Package: metavision-*
Pin: version 5.0.0
Pin-Priority: 1001' > /etc/apt/preferences.d/prophesee"
And then update the list of repositories and install Metavision SDK:
sudo apt update
sudo apt -y install metavision-sdk
Regarding our Python API, the previous command installs the Python bindings of our C++ libraries for the default version of Python of your Ubuntu version (3.10 on Ubuntu 22.04 and Python 3.12 on Ubuntu 24.04). If you want to use another supported Python version (e.g. 3.9 on Ubuntu 22.04), you should install an extra package:
sudo apt -y install metavision-sdk-python3.9
To use our HDF5 ECF codec plugin with some HDF5 tools (for example h5py),
you also have to modify the HDF5_PLUGIN_PATH environment variable:
For Ubuntu 22.04:
export HDF5_PLUGIN_PATH=$HDF5_PLUGIN_PATH:/usr/lib/x86_64-linux-gnu/hdf5/serial/pluginsFor Ubuntu 24.04:
export HDF5_PLUGIN_PATH=$HDF5_PLUGIN_PATH:/usr/lib/x86_64-linux-gnu/hdf5/plugins
Installing Dependencies
Install additional packages required to manage videos and diagnose OpenGL drivers:
sudo apt -y install libcanberra-gtk-module mesa-utils ffmpeg
To execute our Python Samples and use the Python API, you will need Python and some additional libraries. If you plan to use only Metavision Studio for now, you can skip this Python dependencies section.
We support Python 3.9 and 3.10 on Ubuntu 22.04 and Python 3.11 and 3.12 on Ubuntu 24.04.
We recommend using Python with virtualenv to avoid conflicts with other installed Python packages. So, first install it along with the Python development files:
sudo apt -y install python3.x-venv python3.x-dev
# where "x" is 9, 10, 11 or 12 depending on your Python version
Next, create a virtual environment:
python3 -m venv /tmp/prophesee/py3venv --system-site-packages
When creating the virtual environment, it is necessary to use the --system-site-packages option to ensure that
the SDK packages installed in the system directories are accessible. However, this option also makes your local
user site-packages visible by default. To prevent this and maintain a cleaner virtual environment,
you should set the environment variable PYTHONNOUSERSITE to true (which you may add to your ~/.bashrc to make it permanent):
export PYTHONNOUSERSITE=true
Finally, install the necessary dependencies:
/tmp/prophesee/py3venv/bin/python -m pip install pip --upgrade
/tmp/prophesee/py3venv/bin/python -m pip install -r /usr/share/metavision/python_requirements/requirements_openeb.txt -r /usr/share/metavision/python_requirements/requirements_sdk_advanced.txt -r /usr/share/metavision/python_requirements/requirements_pytorch_cpu.txt
Optionally, you can run the activate command (source /tmp/prophesee/py3venv/bin/activate) to modify your shell’s environment variables,
setting the virtual environment’s Python interpreter and scripts as the default for your current session.
This allows you to use simple commands like python without needing to specify the full path each time.
For simplicity, throughout the documentation of the Code Samples, we will assume
the python command refers to the interpreter within the activated virtual environment.
Note
You can use anaconda to install Python and
conda to manage your Python packages, but be sure to use a Python version that we support.
You will need to adapt the library installation steps accordingly and use conda whenever we use pip.
In addition, check that conda PYTHONPATH contains /usr/lib/python3/dist-packages/. If not, add it. For example with sys.path.append() method of python module sys:
import sys
print(sys.path)
# Add /usr/lib/python3/dist-packages/ to PYTHONPATH if the output of print(sys.path) does not mention it.
sys.path.append("/usr/lib/python3/dist-packages/")
In this documentation, we chose to use pip as a package manager.
To compile the C++ code samples, you need to install CMake and some libraries:
sudo apt -y install cmake libboost-program-options-dev libeigen3-dev libprotobuf-dev protobuf-compiler
Get started!
You are now ready to use Metavision SDK. The best way to start getting familiar with the event-based technology is to open an event-based camera with Metavision Studio to begin data collection and visualization. You can choose to dive directly in the SDK by following a getting started guide or looking at a Code Sample.
If you want to use the Machine Learning modules, please follow the next section that describes the required additional dependencies.
Additional Dependencies for Machine Learning Module
LibTorch for C++
To compile and run the ML C++ samples that are using Torch, you need LibTorch (PyTorch’s C++ frontend).
Warning
The prebuilt metavision binaries are not linked with libtorch CUDA. If you wish to use CUDA for accelerating ML inference, please follow the instructions for installing metavision from source.
Download LibTorch 2.9.1 for CPU <https://download.pytorch.org/libtorch/cpu/libtorch-shared-with-deps-2.9.1%2Bcpu.zip>`_
Unzip the archive as a new folder
LIBTORCH_DIR_PATH. For example, for the CPU version:unzip libtorch-cxx11-abi-shared-with-deps-2.9.1+cpu.zip -d ${LIBTORCH_DIR_PATH}LibTorch is delivered with a copy of libgtest libraries. Those should be removed to avoid conflicts:
rm ${LIBTORCH_DIR_PATH}/lib/libgtest.a
rm ${LIBTORCH_DIR_PATH}/lib/libgtest_main.a
Finally, you need to add to add LIBTORCH_DIR_PATH/lib in
LD_LIBRARY_PATH(which you may add to your~/.bashrcto make it permanent):export LD_LIBRARY_PATH=$LD_LIBRARY_PATH:${LIBTORCH_DIR_PATH}/lib
Get Started with Machine Learning
To see the different tools, samples and tutorials available for our ML module, check out our Machine Learning guide.